Lost with how to frost a cake?
If you’ve watched a baking series before, you’ve presumably observed someone icing a single-tier treat and thought, “hey, that looks doable.” It is! With that, allow yours truly to illustrate how to frost in 5 piece-of-cake steps today! By the conclusion, you shall likely be an icing whiz.
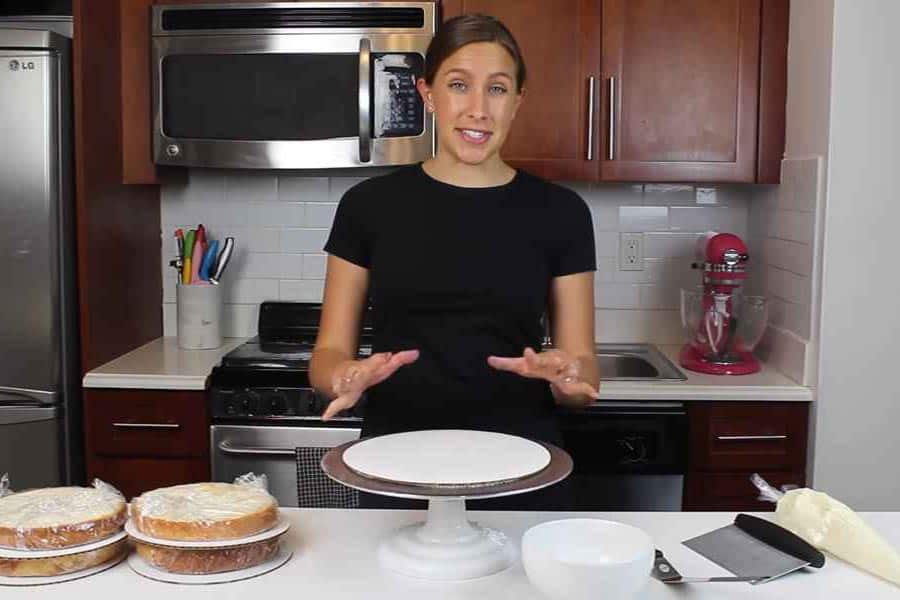
Step 1: Get All Your Materials Ready
Frost things first!
I ensure I have my frosting arsenal prepared before starting. This way, I don’t find myself running around (and causing mayhem and havoc) opening every kitchen cabinet and tossing and throwing everything everywhere later.
Now, myriads of icing equipment are out there, but here are the instruments we will use today:
- Grease-Proof Board: I endorse the utility of this implement because it is undemanding to polish when the sugar coating inevitably gets on it; it helps in producing a spotless finish. (Make sure to get one that is larger than your baked good, though! Otherwise, it will be of no help.)
- Non-Slip Mat: This tool ensures treats will not, well, slip. It can aid in avoiding unwanted movement while taking on the task.
- Rotating Stand: On the flip side, this tool aids in granting more flexibility; it makes getting the coating around the object easier.
- Piping Bag: This instrument can help with distributing the frosting in and on the baked good.
- Bowl: Just have a bowl around. It can aid with holding our sweet stuff, getting of extra icing off on our instruments, and many more.
- Icing Spatula: This baking instrument aids with spreading and smoothening the frosting in and on the sweet thing.
- Bench Scraper: This tool is akin to the icing spatula (for this endeavor, that is).
Step 2: Preparing the Cake
Today might be all about frosting, but we cannot forgo the talk of setting up the treat. After all, this step will greatly influence the ease or difficulty of coating.
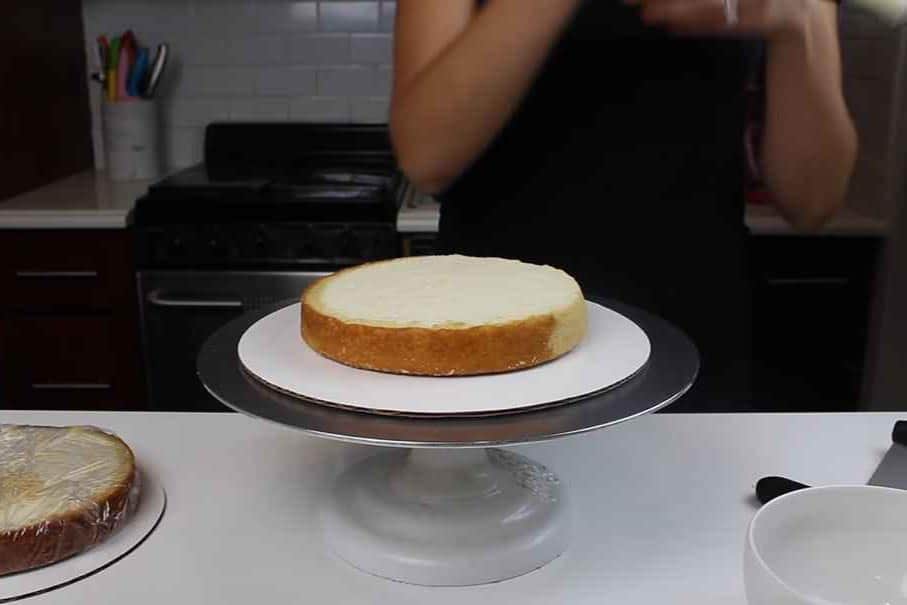
First, trim and level your slabs, as a wonky treat could be punishing to frost smoothly.
After that, we pop the baked goods in the freezer before tackling on the mission at hand – covering a sweet thing with some even sweeter treat! This extra step aids in avoiding problems with the crumbs jumbling with the icing. (It’s a very messy problem, let’s leave it at that.)
Next, spread some of the sweet fluffy stuff on the grease-proof board before setting your slab numero uno up. I know I stated we chose this board because it is undemanding to scrape the extras that will set on it, but no. Do not scrub this off! It will act as glue to keep the piece in place.
What I do here is turn the first layer (bottom slab) upside-down, as the side facing the pan is more even than the opposite side. On the flip side, the last slab (top layer), I place right-side up for the same cause.
Step 3: Frosting Between the Cake Layers
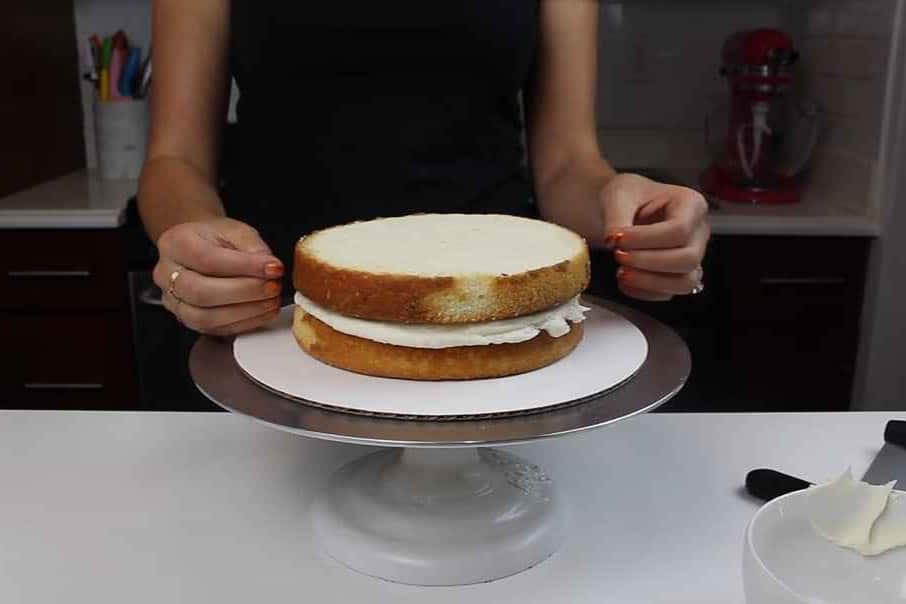
There are various methods to frost in-between slabs.
First, you can utilize a piping bag. Using this baking instrument, frost from the outer portion going in – you’re pretty much drawing a spiral here. After that, use the spatula (or bench scraper) to even everything. Repeat this process for all slabs except the one you will put on the top.
For the other method, an icing spatula (or again, a bench scraper) will be enough. For this, get a generous amount of the stuff, and put it in the heart of the layer. Then, with the same instrument, spread and even. Again, replicate this for all the others except the topmost one.
Ensure that you put some pressure while smoothening everything. In addition, it could also be ideal to press and put some pressure after stacking a piece. (However, be gentle. Otherwise, you could mush the treat! ) You can ensure there are no air bubbles that could try to come out (and ruin) the outer coat later this way.
Step 4: The Crumb Coat
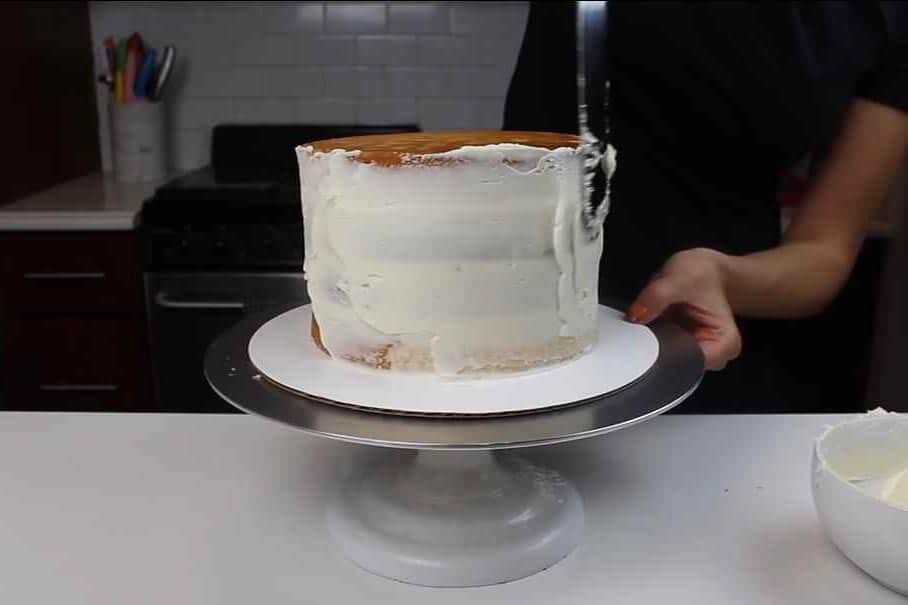
The crumb coat is a layer of frosting that acts as a base before the final coat. With that, you should make it thin.
Similar to the last step, you can choose to use a piping bag or not.
Even if this coat is only a base, do not use it as a reason to be sloppy with it! You should make it as even as possible already. How you do here will influence how easy or tough the last part of the process will be. Again, you ought to be gentle! Otherwise, you could end up ruining your work!
You can stop already if it is a rustic or vintage look you are after. If not, let’s frost our way to the last step now.
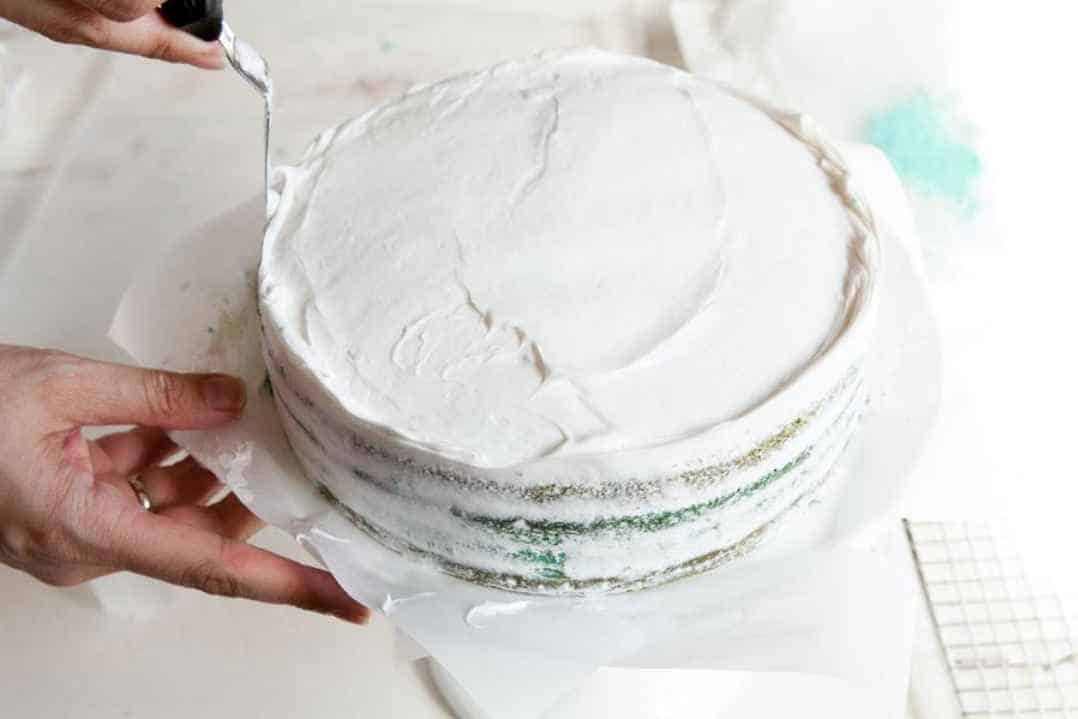
Step 5: The Second Coat

Freeze sweet stuff for five minutes before this step. That way, the crumb and final coat won’t mush together. What you can do to check if it’s set for the last coat is to give it a swipe with your index. No frosting should rub off if it’s ready.
For this, you ought to use lots of the sweet thing. Be very generous with it! (Go crazy!)
You can begin anywhere. However, it is ideal to do so from the top then just work your way to the foot. This way, fixing the overhang will hopefully not be much of a struggle anymore.
Once you cover everything, start smoothening until you are a-okay with its appearance. For this, utilize the spatula or bench scraper (whichever one you are more okay with).
If you manage to completely smoothen out the coat, good job! If it’s the opposite, don’t beat yourself up too much. It only means you need to practice more, and if you practice more, that means more cake!
Final Words
How to frost a cake?
Today, you saw that to frost a cake is a piece of cake that can be done in 5 easy steps! Now, what are you waiting for? All that is left is to accomplish is to take snaps of your hard work, cut yourself a slice, and enjoy your sweet creation!